How to Set Up a Media Wall: TV Units, Cables, and Layout
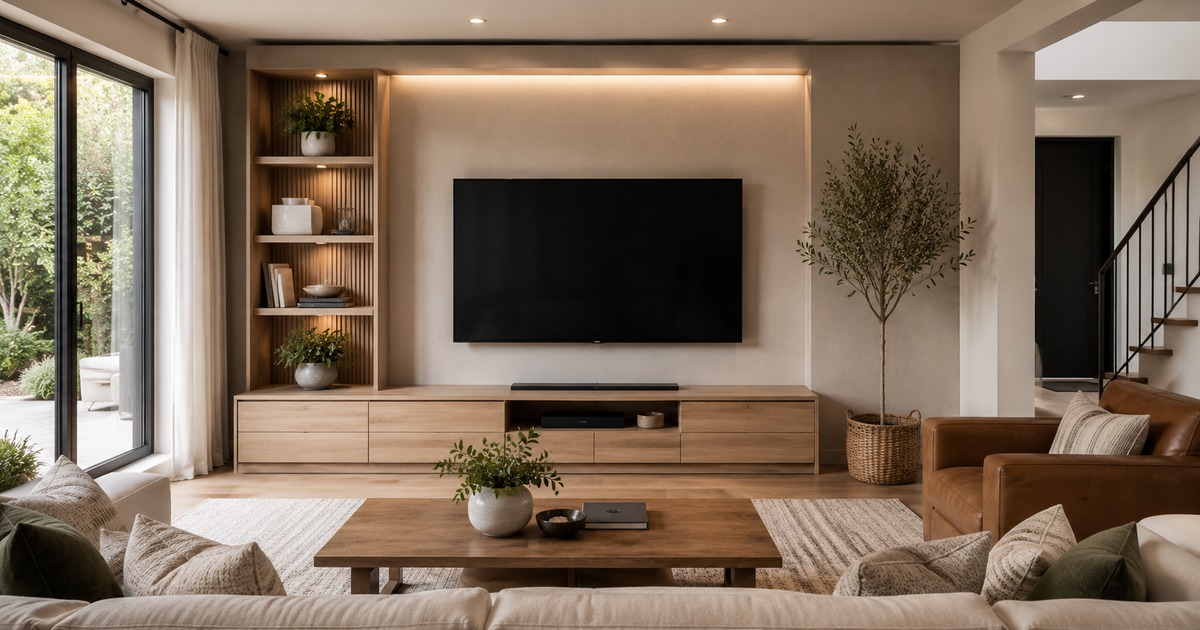
The wall your television lives on tends to be the focal point of a living room whether you plan it that way or not, so a little thought turns a tangle of black boxes and dangling cables into something that actually looks good. Setting up a media wall is not just about buying a TV unit; it is about getting the screen at the right height, choosing between mounting and a stand, hiding the cables, and arranging the components so the whole thing feels deliberate. None of it is hard, and the payoff is a tidy, comfortable setup you stop noticing in the best way.
Start with the screen
Everything else arranges itself around the television, so place that first. The ideal viewing height puts the centre of the screen roughly at eye level when you are seated, which usually means lower than people expect, not perched above a fireplace where you have to crane your neck. Sit on your sofa, look straight ahead, and that line is where the middle of the screen wants to be.
Viewing distance matters too. Sit too close to a large screen and it is uncomfortable; too far and you lose detail. As a rough guide, a comfortable distance is somewhere around one and a half to two and a half times the screen’s width, so let your room size sanity-check the TV size rather than buying the biggest screen that will fit.
Wall-mount or stand on a unit?
Both work; the right choice depends on your wall, your room, and your appetite for drilling.
- Wall-mounting frees up floor space, looks clean, and lets you set the perfect height, but you must fix into something solid and plan how to hide the cables running down the wall.
- Standing the TV on a unit is simpler, needs no heavy fixing, and keeps everything at one level, ideal for renters or solid-wall worries, though it uses floor space and fixes the height to the unit.
- A combination, mounting the screen and placing a low unit beneath it for components, gives the clean look plus storage and is a popular middle path.
If you mount, check what your wall is made of and use fixings rated well above the screen’s weight; if you are unsure, this is a job worth getting right rather than improvising.
Taming the cables
Nothing undoes a tidy media wall faster than a nest of visible cables, and a few cheap habits keep them under control. Route cables together rather than letting them spread, using clips, sleeves, or a length of trunking to gather them into one neat run. If the TV is mounted, you can run cables inside a slim surface channel painted to match the wall, or, for a permanent fix, through the wall itself. Behind a unit, a simple cable box or a row of clips along the back keeps the spaghetti out of sight.
Leave a little slack and label the ends. The day you swap a device or move the unit to clean behind it, you will be grateful not to be untangling a mystery knot.
Storage and components
Think about what actually has to live on the wall: a streaming box, a console, a sound system, perhaps a router. A TV unit with open shelving suits devices that need ventilation and remote-control line of sight, while closed cabinets hide clutter but can trap heat, so make sure anything that runs warm has airflow. Measure your components and leave room to add one more, because the collection always grows.
Choose the unit to suit the room as well as the gear. A low, long unit suits a wide wall and a wall-mounted screen; a taller cabinet works where floor space is tight. The same proportion thinking that guides choosing a coffee table applies here, scale the unit to the wall and the screen.
Lighting and finishing touches
A few simple touches lift the whole setup. A bias light, a soft strip of light behind the screen, reduces eye strain in a dark room and makes the picture pop. Flanking the unit with a couple of plants, framed prints, or a small shelf softens the block of black tech and helps the wall feel like part of the room rather than an electronics counter. Keep these light and uncluttered, the screen should remain the focal point, with everything else quietly supporting it.
Don’t forget the sound
Flat televisions almost always have thin, disappointing sound, so audio is worth planning into the wall rather than bolting on later. A soundbar is the simplest upgrade: sit it on the unit just below the screen, or wall-mount it neatly beneath a mounted TV, and run its single cable in with the rest. If you want fuller sound, leave space and a tidy cable route for small speakers, and a socket nearby, so the setup grows without becoming a mess.
Plan all of this before you fix anything to the wall. The same measure-first, map-it-out discipline from our guide to planning a room layout applies to a media wall: sketch where the screen, unit, speakers, and sockets go, and you avoid the classic mistake of mounting everything only to find a cable has nowhere to hide. Spending ten minutes on a rough sketch genuinely saves an afternoon of drilling, patching, and quiet swearing later. It is the cheapest, most boring step in the whole project, and the one that most reliably separates a tidy media wall from a tangled one.
Frequently asked questions
How high should I mount my TV?
Mount it so the centre of the screen is roughly at eye level when you are seated on your sofa. This is usually lower than people expect. Mounting a TV too high, such as above a fireplace, forces you to look up and causes neck strain over a long viewing session.
What is the best way to hide TV cables?
Gather cables into a single run using clips, a sleeve, or trunking rather than letting them spread. For a mounted TV, use a slim surface channel painted to match the wall, or run them through the wall for a permanent finish. Behind a unit, a cable box or clips along the back keep them out of sight. Leave a little slack for future changes.
Should I wall-mount my TV or use a stand?
Wall-mounting saves floor space, looks clean, and lets you set the ideal height, but needs a solid wall and cable planning. A stand or unit is simpler, needs no heavy fixing, and suits renters, but uses floor space. Many people combine the two, mounting the screen with a low unit below for components and storage.
Written by Ankita Roy
Furniture buying editor focused on practical room planning, material checks, and clear decision guidance.
Related furniture guides
How to Choose a Sofa for Your Space and the Way You Live
A practical, no-jargon guide to choosing a sofa that fits your room, your routine, and your life, covering size, comfort, fabric, and…
Sectional vs Regular Sofa: Which One Actually Suits Your Living Room
Sectional or a regular sofa? A clear comparison of how each works in small, large, and open-plan rooms, so you pick the…
Coffee Table Ideas: Getting the Size, Shape, and Styling Right
How to choose and style a coffee table that fits your seating and space, with practical advice on size, shape, height, storage,…